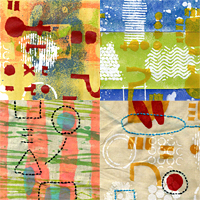
 Fun with Stencils
Craft Project by Carolyn Hasenfratz
Copyright © 2014
Do you like this tutorial? Share it!
Contents:
- Introduction
- Tools and materials
- Make the stencil
- Get dirty!
- Have fun with scraps
- Resources
Introduction
During the 1970s, my Mom was really into Pennsylvania Dutch style stencils for home decor - I still have some of her old stencil brushes! I myself used stencils for some of my printmaking projects in the 1990s. Recently I've been experimenting with different ways of applying inks and paints on fabric, which is an application stencils are very well suited for, along with mark making on walls, furniture, paper and other surfaces. You can cut your own stencils or use pre-made commercial stencils. In this project I'll explain how to cut your own and show some samples of how they can be used.
Tools and materials
Stencil material
Pre-made stencils
X-Acto knife
Plain paper
Low-tack masking tape
Tracing paper
Pencil
Self-healing cutting mat
Tools for applying the ink such as: sponges, stipple brushes, foam brushes, ColorBox Color Blender, sponge daubers, Inkcessories
Assortment of paints and inks
Water containers including one large enough to hold stencils
Rags
Pallete knife
Pallete (can be plastic food container lid or temporary pallete such as a piece of freezer paper taped down to your work surface)
Freezer paper
Old baking pan or piece of cardboard
Optional - scrap art papers of assorted sizes, colors and weights
Optional - Baren
Optional - brayer
Optional - heat tool
Make the stencil
- First draw your design on paper, then trace it onto tracing paper. If you don't have an idea in your head of what you want, you can use copyright-free clip art or antique decorative designs that are old enough to be out of copyright.
- Place your tracing paper penciled side down and tape in place on another piece of paper. Trace over the lines you made and lift paper - your design should be transferred. The reason for making the extra paper copy is so that you don't cut up your original drawing.
For extra fun - trace cookie cutters onto paper and make stencils from those designs, or experiment with decorative hole punches!
- Place self-healing cutting mat on your work surface, and tape paper copy of your drawing onto it.
- Select a piece of stencil material and tape it over the design. You can purchase material especially designed for making stencils, or you can look at the office supply store for folder covers that are made of thin plastic that is either translucent or clear.
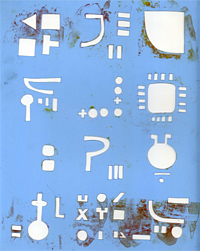
- Cut out your design with the X-Acto knife. I'm aware that there is a heat tool available from craft suppliers for cutting stencils but I haven't tried one out yet. You might like using one of those better than the X-Acto knife. Knife safety tips - when using the knife, try not to make cuts while your other hand is in the path of the blade. If you are cutting straight edges, use a metal ruler with a non-skid surface on the back. A sharper blade is safer because you don't have to press as hard to make a good cut, so to avoid slips use fresh blades.
For extra fun - save the pieces you cut out of the stencil - you can ink those up later and drop them onto a surface to make prints from them too! Just put scrap paper over them and rub well with a baren or back of a large spoon. Or drop them onto a surface without ink to use them as a mask and spray them with color in a spritz dispenser! The old spatter with a toothbrush method works too.
Get dirty!
Now it's time to apply some ink or paint! This is kind of a messy process so to prepare wear old clothes and cover your work surface with freezer paper or other protective layer. Have rags at hand for wiping. I like to have two small containers of water on the table for cleaning tools and a larger container on the floor for soaking the stencils when you're done using them. Most inks or paints will come off the stencils with water, even acrylic paint if you soak them. If any bits don't come off they are unlikely to affect any future use so don't worry.
What kind of ink or paint should you choose? That depends on what surface you want to stencil on and what you plan to do with it later. Stencils lend themselves very well to layering and mixed media techniques, so if you plan to apply more layers you'll want to make sure you use something that won't dissolve. For example, if I wanted to paint over some stenciled paper later with watercolor or acrylic, I'd have to use some kind of paint or ink that is waterproof. If I'm stenciling on fabric, I might choose to use fabric ink or fabric paint or mix some fabric medium with acrylic.
- Tape your fabric or paper down to a portable surface that you can move around while it's drying - a piece of cardboard or an old baking pan protected with freezer paper are good choices.
- Tape your stencil down where you want it and mask off the edges with low-tack masking tape (low-tack is best to avoid damaging paper fibers or other inks that might be underneath - if it's too sticky you can press it against your clothing to pick up lint and reduce the tack).
- If you're new to stenciling experiment with different tools for applying the ink. Sponges, stipple brushes, foam brushes, ColorBox Color Blender, sponge daubers and various tools from the Inkcessories kit are all possibilities. If you don't have any tools handy, you can make a ponce for inking out of rags - just wrap a piece of fabric around some other rags or spongy material and fasten with a rubber band. Not as easy to clean as other tools but it will work!
- Use colors as is or mix some on your palette with the palette knife to get the color you want. If you want a metallic or pearlized look you can add some Pearl Ex powder - it's suitable for mixing into nearly any art medium. Dab your tool into the ink or paint and press over the openings in the stencil. It is likely that your first efforts will bleed a little under the stencil because the ink is too runny or you have too much on the tool. Practice with a leaner application of ink until you learn what the right amount is.
- If your first attempts are a little sloppy, don't worry! Save them for experimenting with later. Many projects look good with a combination of blurred and sharp edges. Let your "reject" pieces dry then revisit them by marking through the same stencil or a different stencil with a permanent marker or a stiffer paint and see what happens! There may be cases where you want a blurry layer before a sharp layer - you might decide to moisten the surface before stenciling to promote blurring.

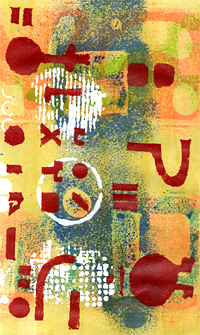
- When you're done applying ink or paint, you have an opportunity to pull a monoprint from the top of the stencil before you pull it up. Place scrap art papers over the stenciled area, place another piece of scrap paper over them, and rub well with a baren. If you don't have a baren, rub with the back of a large spoon. When you pull the paper off, you'll have some grungy scraps that look something like this example. Put the scraps aside and let dry.
- Pull up the tape and remove stencil. Be sure to pull it straight up without dragging so you don't spoil your design.
- Here is something to try if you have a brayer - ink up the positive part of the stencil and pull a print from it! This probably won't work with acrylic paint because it dries too fast but a slower drying ink such as Crafter's will work.
- When you're done with your stencil drop it in the container of water to await cleaning when you're all done with your session.
- If necessary, you can speed the drying of ink or paint with a heat tool, or place your work in front of a fan. That's one reason for taping the piece to a moveable surface - you can move the piece somewhere else to dry while you start work on another one. If you're unsure about whether it's really dry, put a piece of clean scrap paper over it and rub from the back with a baren or spoon. If any ink comes off, it's not dry yet. Some inks, such as Crafter's, are designed to be slow-drying while others will be dry very quickly.
- Heat set with iron between pieces of scrap paper if you're using ink that requires heat setting.
I'm developing some of my fabric experiments further by embroidering on them. Later I will use them on a throw pillow or a tote bag or some other fabric project.
|
|
|
|
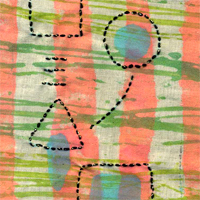
The green ink was applied using the Memory Essentials Get Rollin' Tool with rubber bands wrapped around the roller. The peach ink was sponged on in between areas masked off with tape. The blue ink was sponged through a stencil that I cut. I then drew some linear designs on the fabric with a washable fabric marking pen and embroidered them in black thread.
|
|
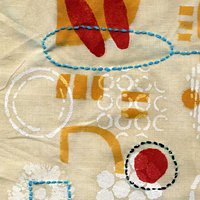
For this sample first I stenciled white paint using the stencil "Well-rounded" by Crafter's Workshop. The red and yellow paint were applied using stencils that I cut from my own designs. Then I added embroidery in blue and black thread.
|
Have fun with scraps
If you took advantage of the opportunity to make monoprints on pieces of scrap art paper, you can continue to layer on random monoprinting to make an interesting background then start to decorate more deliberately. Here are some ideas:
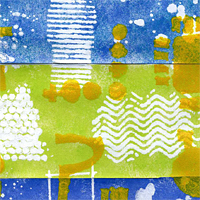
- Use leftover paint to stencil over the scraps. Featured stencils - "Texturized" by Crafters Workshop in white and my own design in gold.
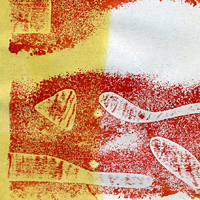
- Make leftover paint into a thin wash and paint over all or part of the scraps. Featured stencil monoprinted in red - one of my own designs.
- Scan the monoprinted pieces and use to make grungy textures for Photoshop art - see my article.
- Develop images further with rubber stamping, rub ons, transfers, drawing, chalks, collaging, or just about any way of making marks that you can think of! The resulting pieces can be used for a variety of paper crafts, for example scraps would be great for these projects:
Resources
Here are some sources for things you can use in this project:
Return to top | Return to Lesson Plan menu
|


 Fun with Stencils


