|
|
 |
|
Polymer Clay Lesson Plan 2: High-Contrast ColorsDo you like this tutorial? Share it!
Note: The polymer clay lessons I've written will make the most sense if they are completed in order. If you have not tried Lesson 1, please at least read over the polymer clay safety information it contains before starting this one. 1. Materials Needed:
Polymer Clay:
Tools: 2. Process  Step 1: Select two clay colors that are opposite each other on the color wheel. Here is a diagram I made of a color wheel. I have indicated the primary colors, red, yellow and blue, by circling them in black. You can use any two colors you choose as long as they are opposites. Click the graphic to access a larger PDF version of the color wheel.
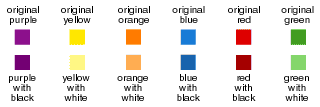
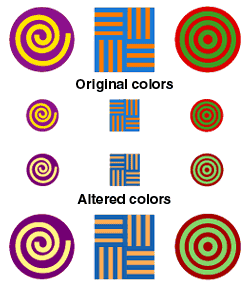
Step 2: Take a look at the two colors you have chosen. Colors that are opposite each other on the color wheel are high in contrast in terms of hue, or color. Decide which is darker and which is lighter in terms of value. White is the highest value possible - black is the lowest value possible. In this excercise we will try to increase the contrast between the two pieces of clay even more by making the light color lighter and the dark color darker. Step 3: First we'll mix a pinch of white with the light color. Mix in enough white to make the color noticeably lighter than the original. When I'm planning on mixing several colors in a session, I mix the light colors first to avoid contaminating them with crumbs of darker color that tend to accumulate on the work surface and under fingernails. 
Step 4: Next we'll alter the dark color. You can use black to make a dark color darker, but you'll often get a much more pleasing color by using dark brown, dark blue, or a dark version of the color's opposite, or complement instead. Experiment with different color combinations and see if you like the effects.
Step 5: Flatten each color into a sheet, using the rolling tool to make it smooth. Trim the edges of each sheet to make identically sized rectangle shapes. Now you have the parts you need to make many basic cane patterns. Try one or all of these patterns (PDF).

Step 6: Reduce your canes by rolling them if they are round, or pressing the sides in if they are square. Step 7: Cool the canes in the refrigerator if necessary. If the clay is too warm, the designs will smear when the canes are sliced. Step 8: Slice the canes into beads. Step 9: Poke holes in the beads with wooden skewers. Step 10: Bake the beads. |
|
|
|
|
| ||
|
| ||
|
Carolyn's Stamp Store
www.carolynsstampstore.com |
Carolyn Hasenfratz Design
www.chasenfratz.com |
The John's Modern Cabins News
www.jmcnews.com |