 Vintage Collage Necklace
Craft Project by Carolyn Hasenfratz Winkelmann
Copyright © 2012-2021
Do you like this tutorial? Share it!
Contents:
- Introduction
- Tools and Materials
- Make the Pendants
- Assemble the Necklace
- Alternate Neclace Designs
- Resources
Introduction
Combine tiny rubber stamps and paper scraps with clear acrylic shapes and a favorite charm to make a unique necklace.
Tools and Materials
Cardstock
Thin scrap paper in assorted light colors including metallic (gift wrap scraps work well)
Clean 8.5 x 11" scrap paper
Black StazOn ink or other permanent black ink
Mica Magic Bronze pigment ink or suitable metallic ink for non-porous surfaces
Metal ruler
Glue stick
Round Top Tags clear embellishments or other suitable clear acrylic blank
Clear-drying adhesive (I tested Omni Gel, Tacky Glue, Gem Tac and Perfect Paper Adhesive and all worked well)
Flat brush
Scissors
Heat Tool
Eyelets (silver)
Eyelet setter
Split rings or jump rings (silver colored)
Split ring pliers
Small needle-nose or round-nose pliers
Small antique key or charm
Ball chain (silver colored)
Wire cutter
Ball chain clasp (silver colored)
Make the Pendants

- Tear out thin strips of the thin paper using a ruler to get a good edge. Stamp on the pieces with words and other small stamps in black StazOn.

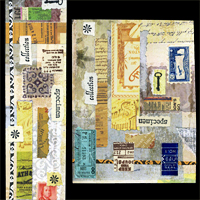
- Starting with cardstock as your base, tear small pieces of decorative paper and glue down with a glue stick to create a collage. Add some of the words and small things you stamped in black.
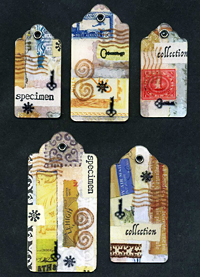
- Remove protective paper covering from acrylic tag. Apply adhesive of choice to collage and one side of clear tag with flat brush. Press together well and let dry.
- Cut around tag to trim off paper.
- Apply a glue stick to the back of some decorative paper and press to the plain paper back of your pendant. Let dry and cut around tag to trim off paper.

- Stamp some accents onto front of tag with metallic gold Mica Magic.
- After Mica Magic is dry (you can speed up with heat tool), stamp more accents in black StazOn.
- Set an eyelet into the hole at the top of the tag.
Assemble the Necklace
- Attach a split ring or jump ring to the hole at the top of the tag, and thread on your antique key or charm so it dangles in front of the tag. If you're using a split ring, this is best accomplished with split ring pliers, and once you have the split ring on, small needle-nose or round-nose pliers really help to rotate the split ring into position.
- Cut a piece of ball chain to the length you want for the neclace and thread it through the split ring. Attach a ball chain clasp to the ends. You're done!
Alternate Necklace Designs
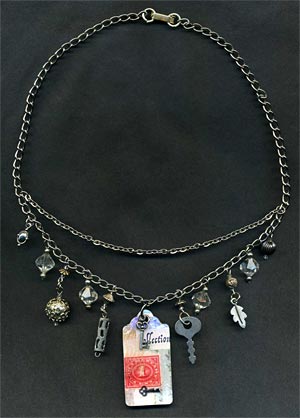
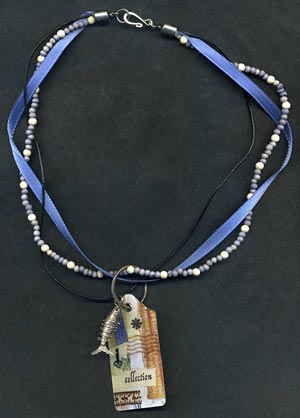
Here are a couple of other ideas for making a necklace from your finished tags.

Tag on chain with charm dangles |

By putting the tage on a jump ring that is large enough to accommodate multiple strands, it becomes a convertible necklace. Click here for more convertible necklace ideas. |
Resources
Rubber stamps used in this sample project:
Sources of vintage images to use as embellishments:
Return to top | Return to Lesson Plan menu
|


 Vintage Collage Necklace


